Here is the project thread for my Honda CR-Z.
I bought the car brand new in July 2010, the spec of the car from factory is :
CR-Z GT 1.5ltr IMA (intergrated motor assist) Hybrid
Dynamic pack
Glow Pack
17" Electra Alloys
Premium White Pearl Paint
The first mods that happened to the car was to change the interior yellow bulbs to LED lights to give the lovely white glow, I also changed the rear number plate lights to LED aswell for the high end look.
I also got hold of some silvertec indicator bulbs to get rid of the egg fried look, alot of the standard lights are LEDs which means less bulbs to buy lol.
The first time I owned it

This is the Hybrid system batteries

Once I got the car home I started to fit all my electronic gadgets, such as my iphone cradle, Road angel with laser detector and my DAB radio, I have now removed the DAB radio as I wasn't really using it as I tend to use the iPod.
I hid a 12v multi-socket behind the dash so that I didn't have to cut into the vehicles wiring and run the risk of any electrical problems later along.
I have also bought a few little things for the car such as a spare tyre kit as it only came with an inflation kit aswell as a boot liner.
I have also recently bought some Password:JDM goodies for the car such as PW:JDM gearknob, numberplate surrounds and my Rock Paper Shocker t-shirt lol.
When the goodies arrived from the USA


My new gear knob, following the blue theme for the interior of the CR-Z

Fitted to the car:

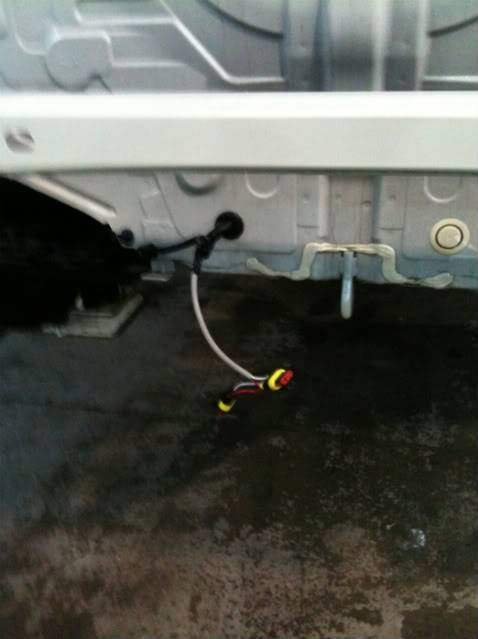
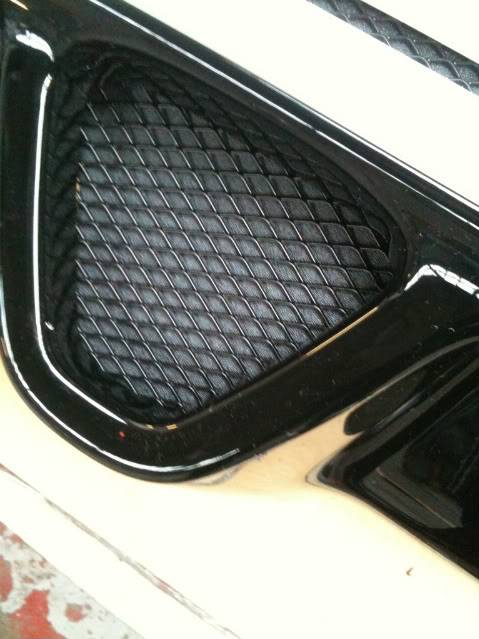
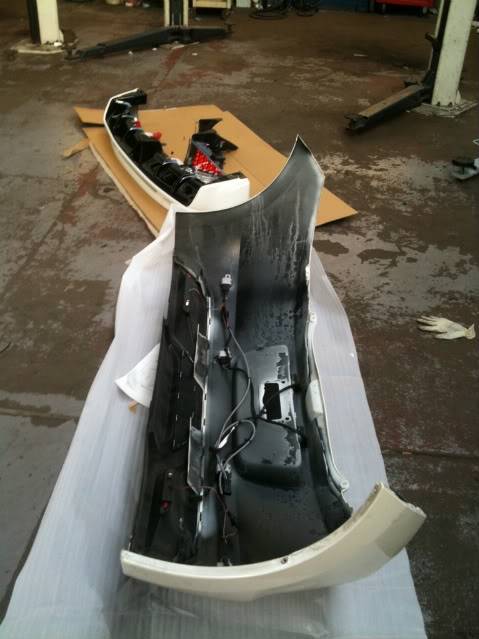
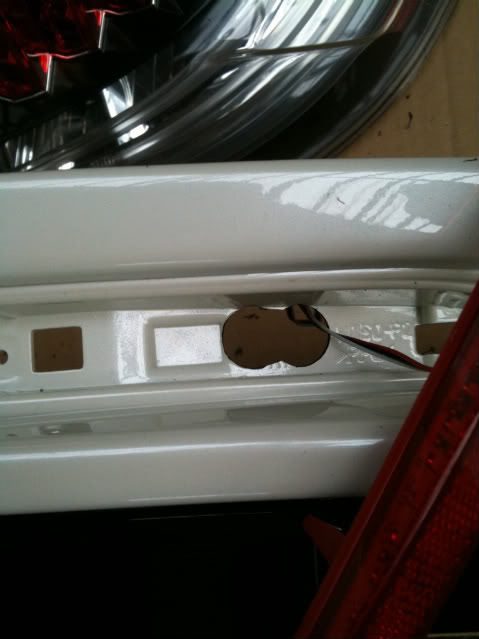
Next on my list was to replace the boring standard reflectors on the back of the car with LED light units, a company in Japan makes replacement light units that forfil my need for light, the great thing with them is that they have a sidelight function and a brake light function so are really cool, the only un cool bit was the wiring in to CR-Z, I printed off the diagrams from Honda and the colours wernt as straight forward as i thought that it would be; but I tackled through it, shown below are various pictures through the build, from custom making of the looms and fitment into the bumper.
Removal of parts:


Naked Bum:

1 light unit installed:

Making of the loom for the rear bumper:

Loom finished on the bumper:

Time to fit the loom to the CR-Z, I decided to use the grommet that has the loom for the rear parking sensors and the number plate lights.
Test Time (in these pics it only shows the side lights):
In the workshop:

At night:

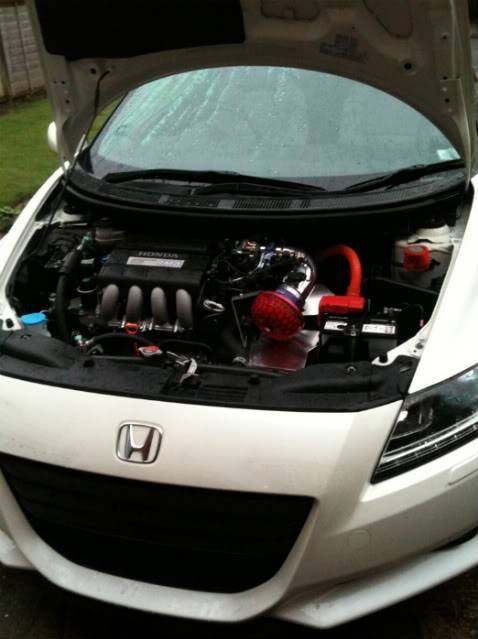
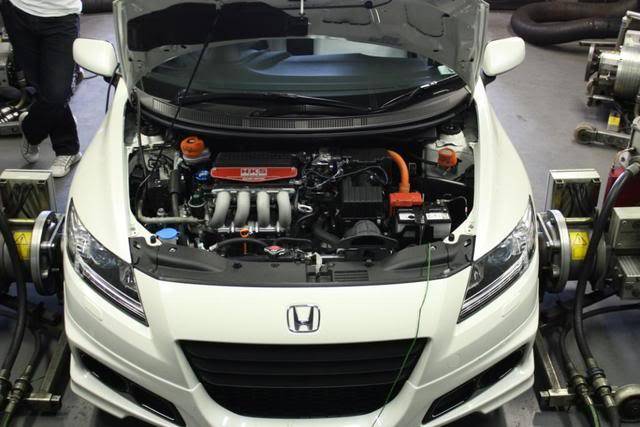
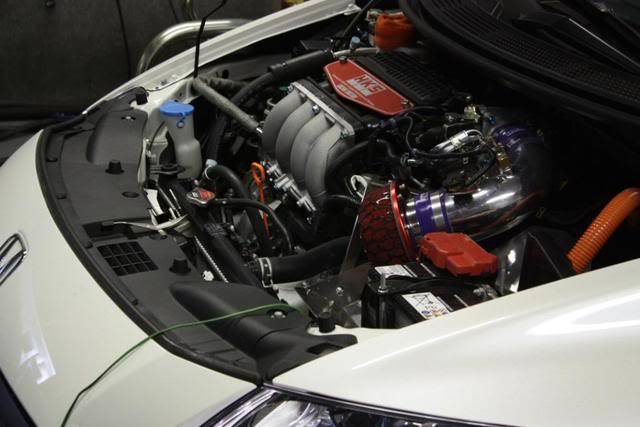
Next came time to fit the "Shiney" parts, this consisted of a HKS suction reload kit - Goodbye standard air filter.
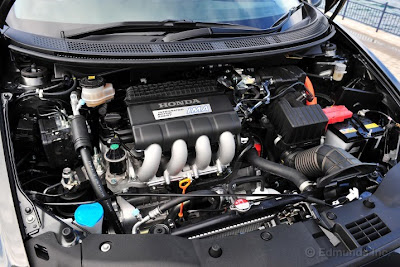
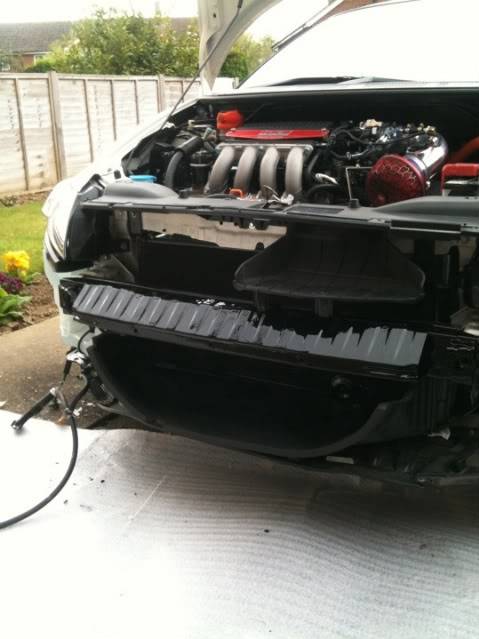
The engine bay prior to HKS:
First of all was removal of all the Honda parts, to get the resonance chamber off the vehicle, i had to do a lot of swearing as it was buried the wrong side of a chassis leg, so this mean half the bumper was off and the N/S/F arch liner was adjusted via a lever bar, then it came out.
The parts surplus to requirement:

Also in the process of removing the front bumper I decided to loose the front number plate to clean the look of the car up.
Now with the shiney parts installed:
The only part I am missing is the engine plate that unfortunatly was damaged in transit, so HKS are sending another one over. Finally the plate arrived so without any wait it was fitted :-)

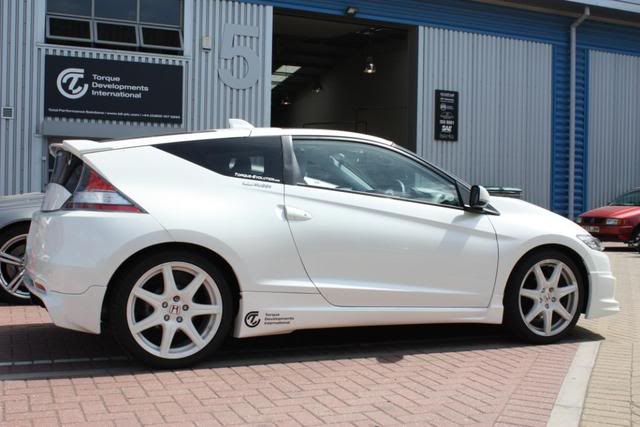
After the Suction Reload was fitted I decided to fit the Mugen side skirts.
Before:

As you can see the standard skirts are very rounded and have a "soft" look
Now with the old skirts removed

They were a little filthy lol
Now the naked car all cleaned as some minor mods were needed

The black circles are stickers that come in the kit to cover the original locating holes

Side skirts fitted

As well as upgrading the side skirts I decided the wheels could do with a change, so I found a set of nearly new Championship White alloys off the FN2 Civic Type R, these were only fitted to a limited range of civic type r's as these were the first civic to feature a LSD as standard, most of the new generation of civics feature the LSD as standard now. I also fitted some tyre pressure warning sensors which monitor temp of the tyre and the pressure, yes it's a gimmick but I like it.
After these I had the Mugen bug lol so I got another sweat band for the brake fluid and I got the front spoiler, Mugen had 1 in White in stock so I treated my self also I was fitting it to a brand new front bumper as mum managed to scrape mine when parking her car.
It arrived, it was so hot it needed venterlation

On the way home, who said the crz was small inside, the day before it had the new front bumper in there

I borrowed my Nan and Grandads lounge to assemble the new addition, the food service is great they supply me with bacon sarnies and cups of tea

Front with out the bumper

Spot the difference
Good bye old bumper - my Grandad had great fun in using his cutter on this

This is the front grills that are intergrated in the Mugen front lip

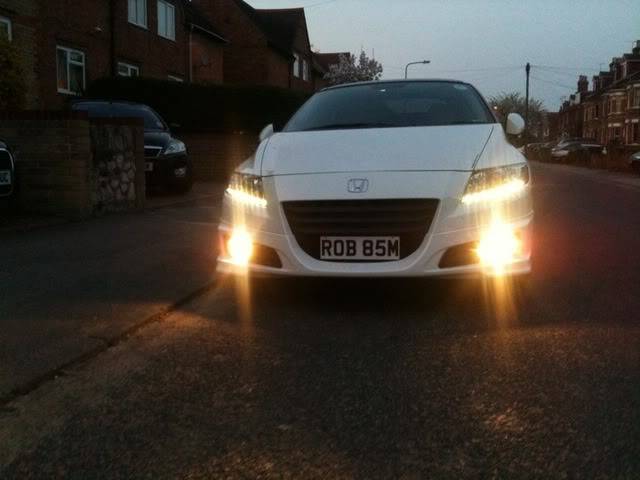
This is it fitted with the lights on and off

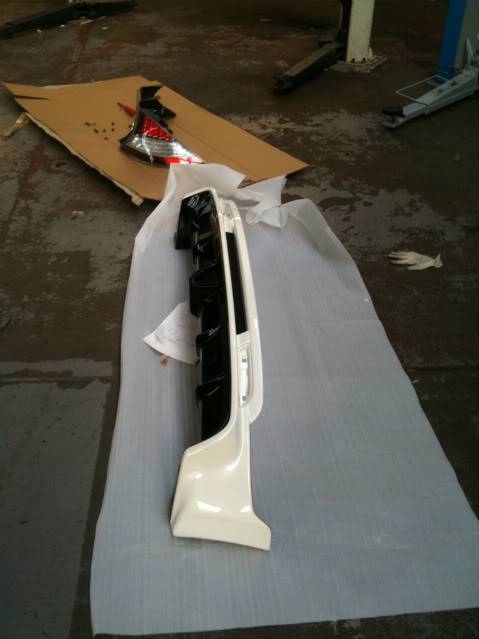
Now I had some extra Mugen goodies turn up at work, I had ordered the rear diffuser to finish off the kit, aswell as 2 metal Mugen badges and a carbon fibre mirror cover.


As work finished it was time to open my presents
This shows the detail in the grills
Now it was time to take the bum off the CR-Z again (I'm getting quite good at this now)

Old lined up against the new
Now was the worring bit i had to drill the diffuser to fit my extra lights (was kinda dreading this bit)
Now fitted and relax

Current bumper with the old diffuser removed, the 2 white bits that stick down i had to cut off the bumper so the new bit would fit

Before:

and after:

The side profile

Fully fitted

And with the extra lights

These are the other Mugen extras i bought, 2 Mugen badges (yes they are real)

Aligning on the car

Fully fitted

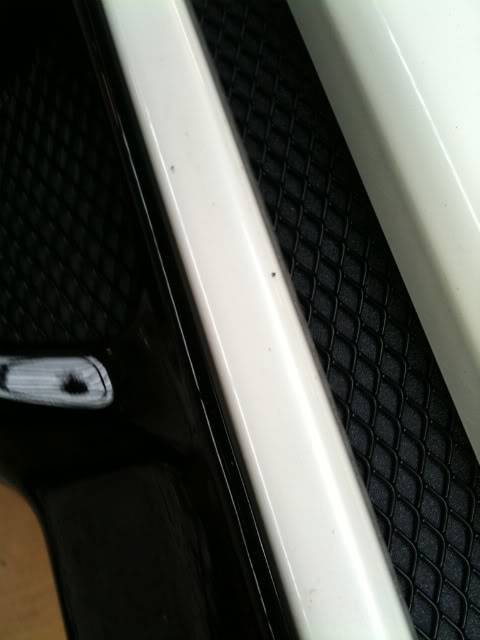
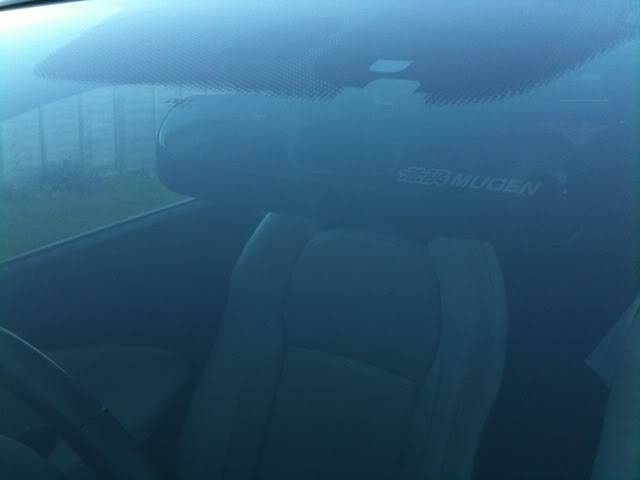
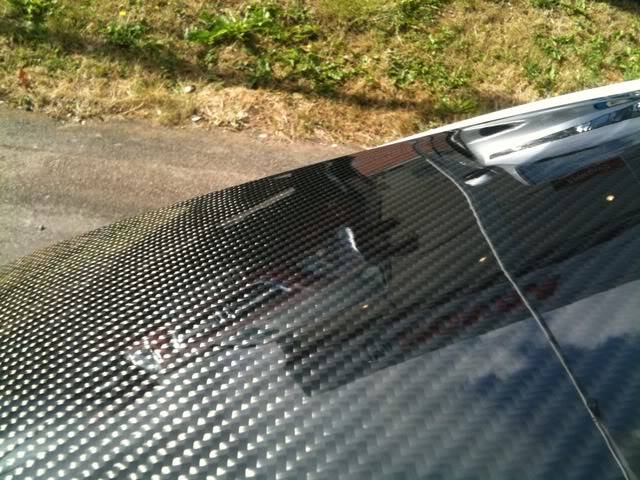
My Mugen Carbon Fibre interior mirror cover

The weave

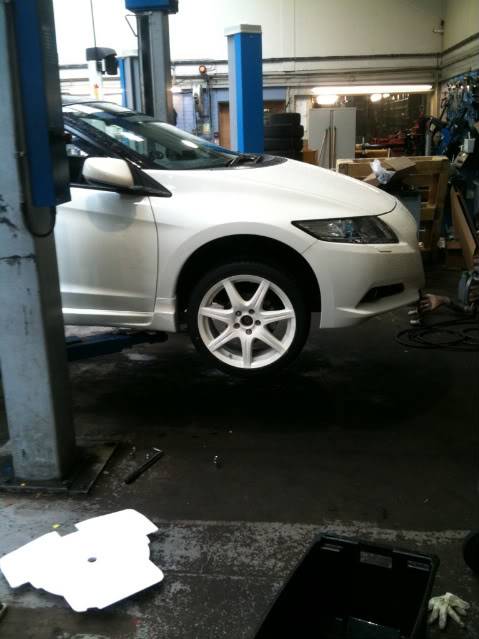
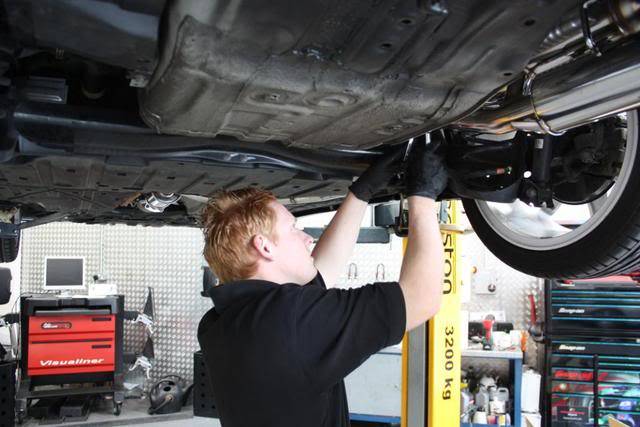
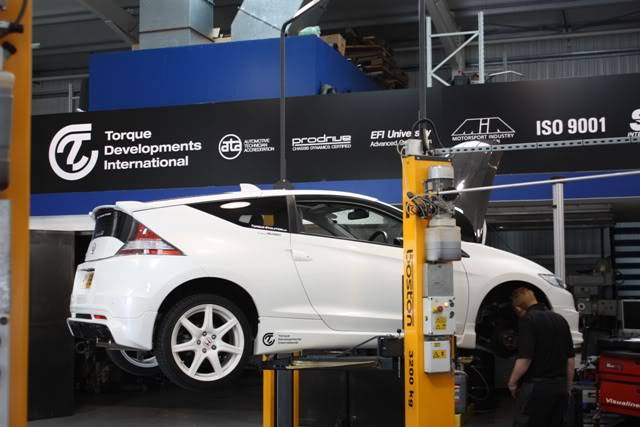
Next it was time to take the car to TDI over at Thurrock where the very knowledgable guys and girls invited me to have the CR-Z fast road setup, first of all we was trying the adjustable camber bolts to see what the standard setup was like without upgrading the springs etc.
This is the car fitted with the adjustable bolts on the front allowing TDI to get the camber setup so that there is more of the tyre incontact with the ground:
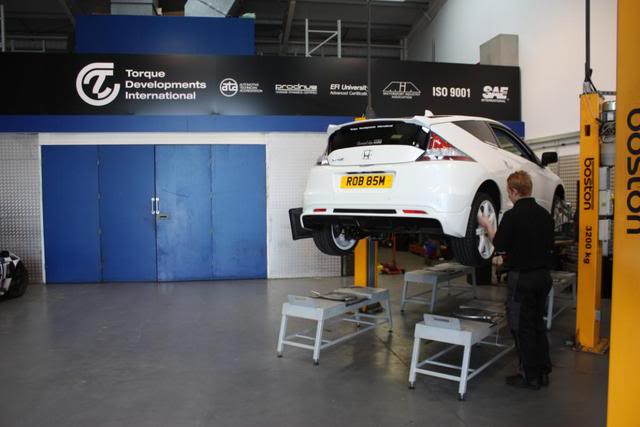
Getting the car all setup:


Once it was all adjusted it was time to take the car out with one of the Prodrive trained staff from TDI, the turn in was vastly improved and the overall stability was improved aswell.
Next on the list was to check what the car was producing with different mods, as I already had fitted the HKS suction reload, it was time for this to come off and return back to the standard airbox, as we was testing the car to see what it was like in standard guise.
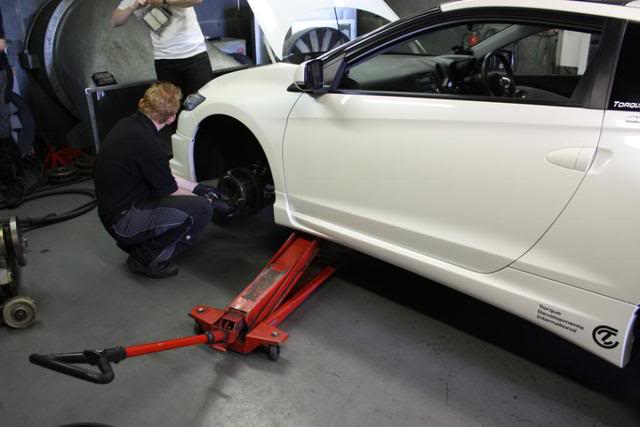
In the picture below you can see the wheels on the front have been removed and the adapters for the hub dyno have been fitted (also you can see myself breaking out the virginal air filter), the great thing with a hub dyno is that it is more acurate and it doesnt put your tyres under extreme stress when having the car on a rolling road type dyno, find more info [URL="https://www.tdi-plc.com/index.php?pge=C_dynocam"]here[/URL]
The next thing was to fit the Rototest Dyno's, these go where the wheels do and the fans at the side of the dyno room are powered by the dyno's going round aswell as having a massive fan in the middle all for providing enough air for the cars
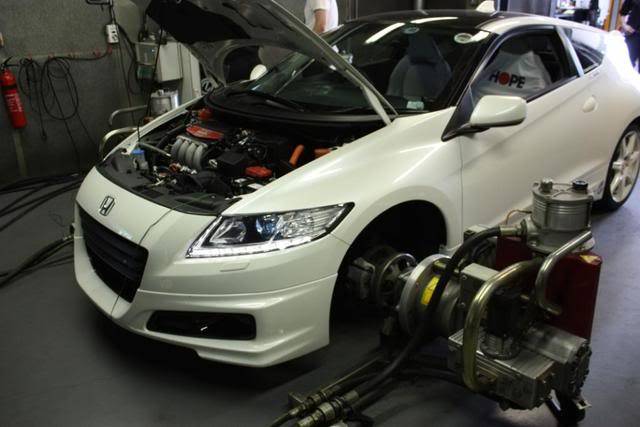
Now the car was all ready
The car before the run has its oil and water levels checked and once this is done and the computer is all setup, then the car is run at a low speed with a set of headphones bolted to the engine block, the noise of the engine is checked for any underliying issuses when it gets the green light then its on to check the power that the car is producing; Being a hybrid we wanted to flatten the assistance batteries so that we could see the actual "mechanical" HP rather than seeing what the car produces with the batteries.


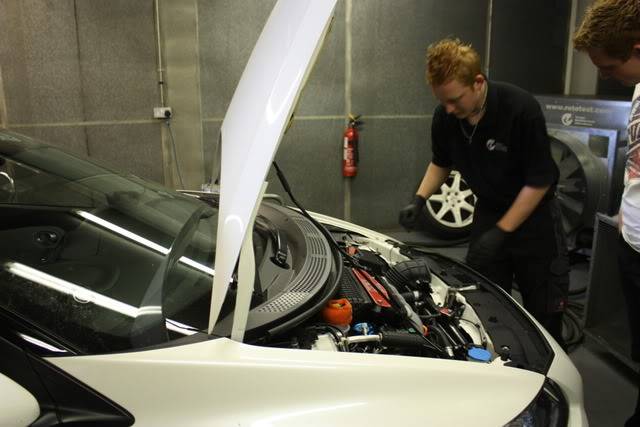
Next it was time to fit the HKS shiney bits on the car, we first of all fitted the HKS suction reload to see the differences that this made..(hp wise and atheticts wise)
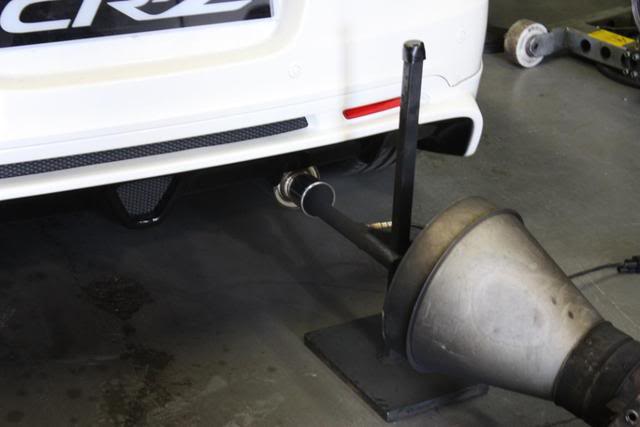
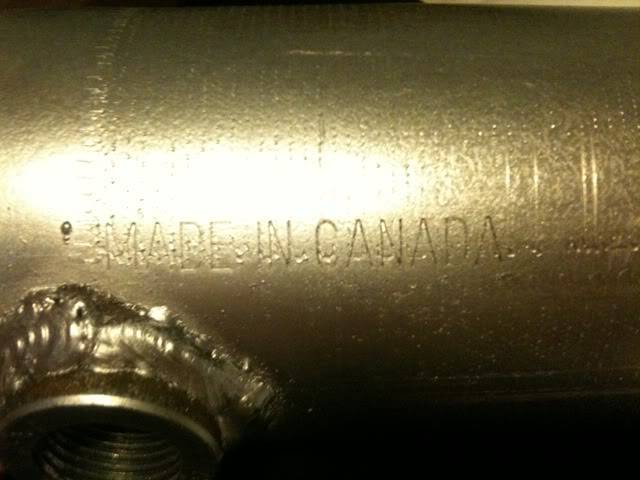
After the tests were done, it was time to get the car out of the dyno and let the exhaust cool so that we could change it for a nice new shiney number made by HKS, this is the HKS Silent Power, its a rear box and centre pipe.
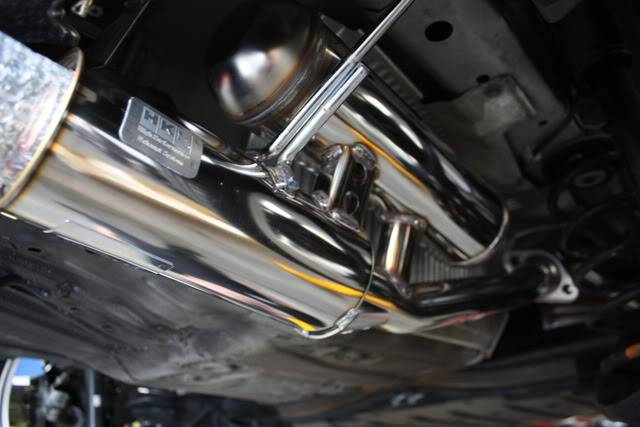
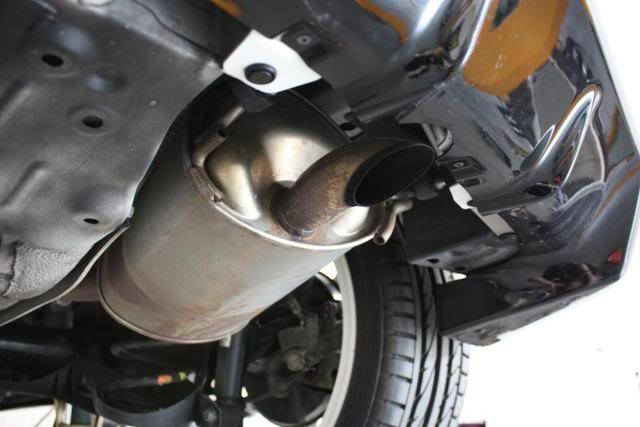
This is the original pipe thats fitted to the CR-Z, doesnt it look so nice:
Here is Matt from TDI, helping to remove the ghastly old pipe and fitting the shiney new one

Next it was time for the car to go back in the Dyno and see how the mods work together
With all the mods done, it was time to break the back outside and see how it sounded, with the suction reload and the silent power exhaust the torque and hp is up and the exhuast note is great, its quite when you need it to be, but when your putting your foot down, the burble and noise as you go round the rev range is great, not what you would expect from a CR-Z
The next mod in the line up was to get a Seilbon C/F bonnet, I was weary at first because of what would it be like, will i have to mod the car much, will it fit (this was one of the reasons i went with a mugen bodykit - becuase the fit it faultless), well the bonnet came thatsnks to Cheryl at TDI and it was basically take the old one off and fit the new one

This is a close up of the weave

Next it was time for some more playing with the chassis thanks to TDI and Eibachs, this time it was time to get the Eibach Pro Kit fitted, this is a set of progressive springs that lower the vehicle by about an inch (2.5cms). The great thing with the kit is that you can use the standard factory dampers, which mean when you are modding on a budget then these are an ideal way to create a dramatic look and get the wheel to fill the arch and improve the handling, we also adjusted the camber bolts as the ride height had been lowered.

Fitting the Kit
Now time to adjust the camber bolts

The new stance on the car


Since the kit has been fitted the stabillity of the vehicle has been vastly improved, the turn in on the corners is alot better, aswell as the road holding under all driving is brilliant, I was quite suprised how much improvement just a spring kit can have, the great thing with only lovering the vehicle by an inch is that the ground clerance is still fine, I havent scraped over any speed bumps yet, although I am very careful.
The next mods are minor in comparison to the springs, but I have the full JDM bug (or bird flu), a few months ago I purchased a Password:JDM number plate frame, but I hadn't found some to make the number plate how i wanted it, but recently at a car show, I spoke to a number plate maker and with a set of Mugen number plate bolts this was created


and fitted:

Everyone has there own views but i like it.
More JDM stuff, from Honda Japan


The next mod again from Honda Japan was some official side wind deflectors, I had a set of the Heko deflectors and there is no comparison, the Honda kit is well worth the money, the great thing is that they dont really show but anyone with a CR-Z will know that they are a must as if there is any water on the outside of the will know it likes to run straight in the open window and on to the window control panel.

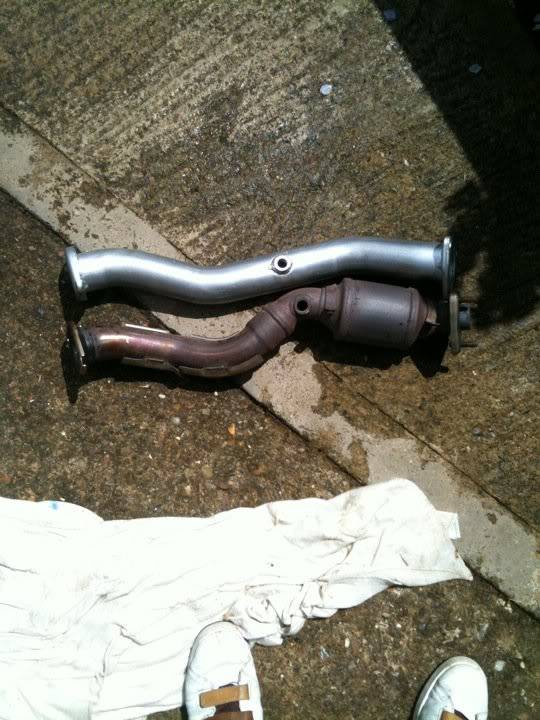
The latest item to arrive from the USA was a de-cat pipe to remove the second cat, the great thing we learnt when fitting the HKS exhaust was that the sensor for the cat was before the 2nd cat so that means that it can be removed without having to worry about the dreaded EML light - WHOOP, I am aiming to get it fitted when I am at work tomorrow, here is the lovely item (it came with a new gasket and a nut and bolt set.

Well after a day of getting rained on and sqeezing under the car without lifts or air tools, the car has been removed and the de-cat fitted.
The exhaust note has picked up a tone and it sounds a long way from when it was running the standard exhaust, the interesting thing will be at the TDI dyno day to see if it has increased the HP and Torque.
So currently its a thumbs up from me, also thanks to my nan and grandad for suppling me with bacon sarnies.
****NOW ON HONDAS WEBSITE****
Honda Stories WHOOP!!!!!!!![/QUOTE]
Keep an eye out for more to come
If you like the parts you see here, they can be sourced through Cheryl at TDI at Thrurrock (say you saw Rob's CR-Z thread): 01708 866609
If you want to mod a car I would always recommend that you ask people in the know, I have had a great amount of support from the people at TDI and there extensive knowledge and guidence is greatfully recieved


